
How Can I Add a Watermark/Logo for Multiple Photos at a Time?


In this blog post, we will explore the essential process of adding watermarks or logos to our photos, ensuring the protection of our precious creations from unauthorized use. Seeing our work being used without permission can be disheartening, but we can safeguard our art with the power of watermarks.
Adding watermarks to photos preserves our ownership and allows us to share our creativity confidently. We understand that dealing with multiple photos can be time-consuming, so we have compiled efficient methods to add watermarks to multiple photos simultaneously, making the process convenient and hassle-free. Moreover, we have included free solutions for those who prefer budget-friendly options.
Whether you are a photographer, designer, or content creator, learning to add watermarks to your images can bring peace of mind and control over how your work is used online. Join us as we dive into the world of watermarking and discover the best practices for securing your visual masterpieces.
Easiest and Fastest Way to Watermark Multiple Photos at Once
We will unveil the easiest and fastest method to watermark multiple photos simultaneously. Adding watermarks to numerous images can be time-consuming, but with our simple and efficient solution, you can protect your photos from unauthorized use and share them confidently.
Whether you're a professional photographer or a content creator, this quick and hassle-free approach will save you time while ensuring the security of your valuable visual assets. Join us as we explore this convenient way to add watermarks to your photos in just a few easy steps.
What is Watermark on a Photo?
A watermark in a photo is a semi-transparent mark or logo superimposed onto the image. It is used as a form of copyright protection, branding, or identification for the owner or creator of the image. Watermarks are typically placed in a way that doesn't obscure the main content of the photo but is still visible enough to deter unauthorized use or distribution.
By adding a watermark, photographers, artists, and content creators can ensure that their work is credited to them and discourage others from using their images without permission. Watermarks serve as digital signatures, providing protection and recognition for the original content creator.
Why you Should have a Logo or a Watermark on your Photo?
Having a logo or watermark on your photo is essential for several reasons:
1. Copyright Protection: By adding a logo or watermark, you assert your ownership and claim copyright over the image. It is a deterrent against unauthorized use, as others are less likely to steal or misuse the photo.
2. Branding: If you're a business or a content creator, a logo watermark helps in branding. It reinforces your identity and ensures your work is recognized, even when shared on different platforms.
3. Professionalism: Watermarks add a professional touch to your photos. It shows that you take your work seriously and care about protecting your creations.
4. Marketing and Promotion: A well-designed logo or watermark can attract attention and drive traffic to your website or social media channels. It acts as a marketing tool, promoting your brand to a wider audience.
5. Recognition: In a world flooded with images, a watermark ensures viewers remember who created the photo. It helps build a reputation and facilitates recognition among your audience.
6. Prevent Misuse: With a watermark, people are less likely to use your photo without proper attribution or permission. It encourages others to respect your work and ask for authorization if they wish to use it.
A logo or watermark adds professionalism, protection, and promotion to your photos, making it a valuable asset for any photographer or content creator.
Benefits of Watermark and Logo on Photo
Adding a watermark or logo to your photos offers numerous benefits for photographers, content creators, and businesses. It goes beyond just protecting your work; it enhances your brand identity and is a powerful marketing tool. Let's explore the key advantages of incorporating watermarks and logos in your photos:
1. Copyright Protection: A watermark or logo helps protect your intellectual property rights. You assert ownership and discourage unauthorized use or theft by visibly displaying your mark on the image.
2. Brand Recognition: Consistently using a logo or watermark across your photos reinforces your brand identity. It creates brand recognition, making it easier for viewers to associate your work with your brand.
3. Professionalism: Watermarks and logos lend a professional touch to your photos. They demonstrate that you take your work seriously and add credibility to your images.
4. Marketing and Promotion: When your watermarked photos are shared online, they are a marketing tool. They promote your brand or website to a wider audience, potentially driving more traffic and engagement.
5. Attribution and Credit: A watermark ensures proper attribution for your work. Viewers can easily identify the source of the photo, leading to appropriate credit for your talent and effort.
6. Client Engagement: For businesses, a logo or watermark on client photos helps promote the brand to a wider audience when shared on social media or websites.
7. Brand Consistency: Using watermarks or logos maintains brand consistency across various platforms, ensuring your work is easily recognizable regardless of where it appears.
In conclusion, incorporating watermarks and logos into your photos offers a range of benefits, from safeguarding your work to enhancing brand recognition and marketing efforts. It's a valuable strategy for protecting your creative assets and establishing a strong brand presence in the digital world.
List of Tools Helping to Add Watermark & Logo in Bulk
Protecting your images with watermarks is crucial for photographers, content creators, and businesses. However, manually adding watermarks to many photos can take time and effort. Luckily, there are efficient tools available that allow you to add watermarks in bulk, saving you valuable time and effort.
In this article, we will explore powerful tools that make adding watermarks to multiple photos easy at once, helping you safeguard your creative work and maintain a professional brand identity.
1. BatchPhoto Pro: Add Watermarks in Bulk with Ease

BatchPhoto Pro is a powerful bulk image tool available for both Mac and Windows that allows you to convert, edit, and share over 170 image formats, including raw and common image types. Among its editing features is the Watermark Add option, which allows you to simultaneously add text, logo images, or masks to multiple photos. With BatchPhoto, you can also apply various other edits such as date stamps, effects, rotation, resizing, and more, all in batch.
Standout Features of BatchPhoto Pro:
1. Convert 170+ image formats, including raw to jpeg and png to eps.
2. Edit images by adding watermarks, comments, effects, rotating, resizing, and more.
3. Preview images before processing.
4. Export images in 50+ formats.
5. Share files to FTP or send them via email.
Pixillion Image Converter: Lightweight Solution for Watermarking
For a lightweight image program, Pixillion Image Converter is a great choice. It offers conversion for 50+ image formats and limited editing features for both Mac and Windows. Pixillion provides two options to add watermarks: text or image.
Standout Features of Pixillion Image Converter:
1. Convert 50+ image formats, including raw to jpeg and PSD to jpg.
2. Add watermarks to images using text or image overlays.
3. Bulk resize, flip, rotate, and compress images.
4. Preview images before processing.
5. Export images in 20+ formats, including JPEG, PNG, PDF, WEBP, PSD, and SVG.
Adding Watermarks with BatchPhoto Pro:
Step 1- Install and open BatchPhoto Pro on your Mac or Windows PC.
Step 2 - Import the photos you want to watermark.
Step 3 - Head to Edit Photos and choose Add Filters > Watermark Text or Watermark Logo. Input the text or logo, and adjust the settings.
Step 4 - Go to the Setup page, choose the output folder and format.
Step 5 - Click Process, and BatchPhoto Pro will add watermarks to all your photos.
Adding Watermarks with Pixillion Image Converter:
Step 1 - Install and open Pixillion Image Converter on your Mac or Windows PC.
Step 2 - Import the photos you want to watermark.
Step 3 - Click on Effects and choose Watermark Text or Watermark Image. Enable it and adjust the preferences to personalize your watermark.
Step 4 - Choose the output folder and format.
Step 5 - Click Convert to add watermarks to multiple photos.
Protect your creative work and brand identity using these efficient tools to add watermarks to your photos in bulk.
Free Solution for Mac: Adding Watermark to Multiple Photos with Preview
Preview: Your Free Image Editing Utility
Preview is a built-in application on macOS that allows users to read and edit image files. While it may offer limited editing features, it provides the essential tools for adding watermark logos or text to images. This makes Preview a handy option for those looking to watermark their photos without spending extra money.
Batch Watermarking with Preview
With Preview, Mac users can also add watermarks to multiple photos simultaneously. However, there is a limitation - you can only add watermarks to saved photos in the same format.
Unfortunately, Preview won't allow you to open multiple images of different formats in the same window for batch processing. Despite this constraint, Preview is still a useful and cost-effective tool for quickly and efficiently adding watermarks to multiple photos quickly and efficiently.
Protect and Brand Your Photos with Preview
Whether you're a photographer, content creator, or business owner, using Preview for watermarking ensures that your images are protected from unauthorized use and that your brand gets the recognition it deserves.
With its user-friendly interface and free availability on Mac, Preview is a valuable resource for anyone seeking a simple yet effective solution to add watermarks to their photos.
2. Preview by Mac: A Versatile Tool for Adding Watermarks and Logos

Preview is a built-in application on macOS that offers a wide range of features, including adding watermarks and logos to your photos. This powerful tool comes pre-installed on all Mac computers and provides an easy-to-use interface for editing and annotating images.
Key Features of Preview:
1. Adding Text Watermark: You can easily add a text watermark to your photos using the "Text" tool in Preview. Open the image, click the "Show Markup Toolbar" icon, select the "Text" tool, and type your watermark text. You can customize the watermark's font, size, color, and position.
2. Adding Image Watermark: Preview also allows you to add an image or logo as a watermark. Open the image in Preview, go to the "Tools" menu, select "Annotate," and then choose "Add Image." You can then browse and select the image you want to use as the watermark and adjust its position and transparency.
3. Batch Watermarking: While Preview doesn't have a specific batch processing feature, you can simultaneously add the same watermark to multiple images. Simply open all the images you want to watermark in Preview, select the watermark you created, and copy-paste it onto each image.
4. Custom Watermark Styles: Preview offers various customization options for your watermarks, allowing you to create unique styles that match your brand or preferences. Experiment with different fonts, colors, and sizes to find the perfect watermark for your photos.
How to Add a Watermark or Logo with Preview:
Step 1 - Open the image you want to watermark in Preview.
Step 2 - Click on the "Show Markup Toolbar" icon, which looks like a toolbox, to reveal the editing tools.
Step 3 - Select the "Text" tool from the toolbar and click on the image to add a text box.
Step 4 - Type your desired watermark text and adjust its position and style using the formatting options in the toolbar.
Step 5 - If you want to add an image watermark, go to the "Tools" menu, select "Annotate," and choose "Add Image." Browse and select the image you want as the watermark and adjust its position and transparency.
Step 6 - Save the edited image Once you are satisfied with the watermark.
Preview by Mac provides a simple and effective solution for adding watermarks and logos to your photos. It is a valuable tool for content creators, photographers, and businesses looking to protect and brand their visual assets.
3. Watermark.ink: An Easy Solution to Add Watermarks and Logos
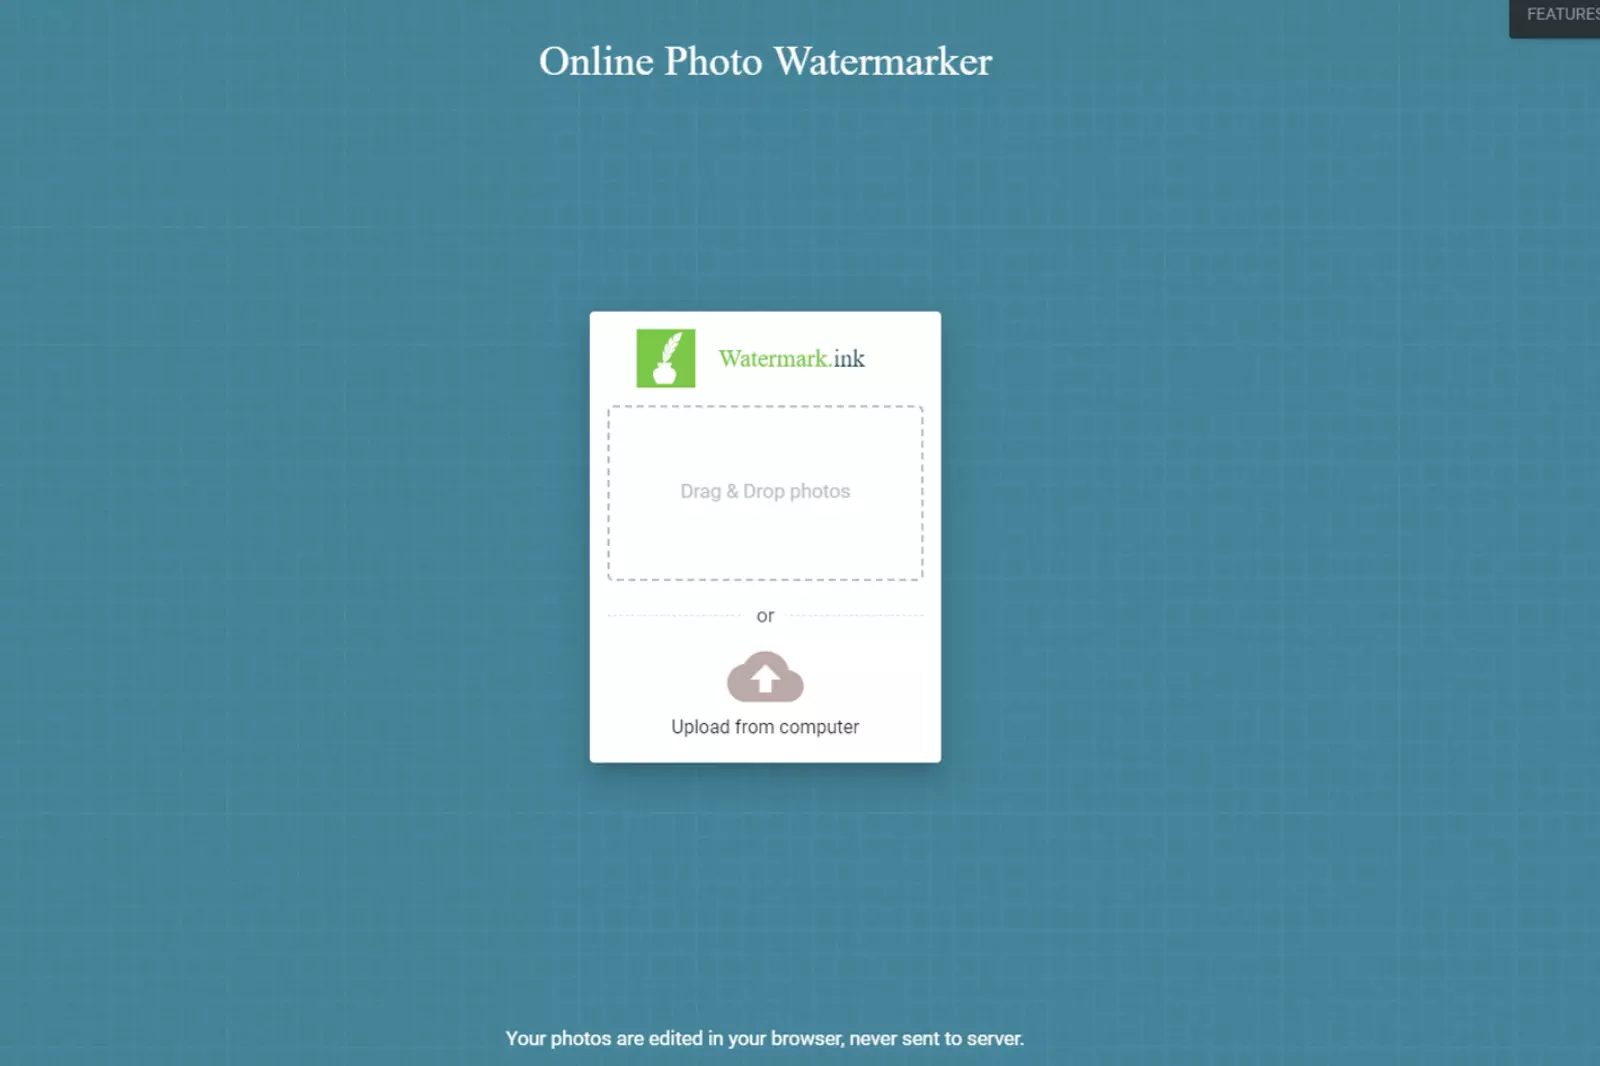
Watermark.ink is a versatile online tool that simplifies the process of adding watermarks and logos to your photos. Whether you are a professional photographer, a content creator, or just someone who wants to protect their images, Watermark.ink offers a user-friendly interface with powerful features.
Key Features of Watermark.ink:
1. Multiple Watermark Types: Watermark.ink allows you to add both text and image watermarks to your photos. You can choose from a wide range of fonts and customize the watermark's size, position, and opacity.
2. Batch Processing: Save time by watermarking multiple photos at once. Watermark.ink supports batch processing, making it efficient for bulk editing.
3. Image Resizing and Compression: In addition to watermarking, you can resize and compress your images without compromising on quality.
4. Transparency Support: Create transparent watermarks for a more professional and subtle look on your images.
How to Use Watermark.ink:
Step 1 - Upload Your Photos: Visit the Watermark.ink website and upload the photos you want to watermark.
Step 2 - Customize Your Watermark: Choose the type of watermark you want to add - text or image. Customize the watermark's appearance, position, and size to suit your preferences.
Step 3 - Preview and Process: Review the watermarked images in the preview window to ensure they meet your expectations. Once satisfied, process the photos, and Watermark.ink will save the watermarked images to your device.
Step 4 - Download and Share: After the watermarking process, download the images to your computer, which are ready to be shared or published.
Watermark.ink provides a seamless experience for watermarking your photos. With its efficient batch processing and customization options, it is an excellent choice for adding watermarks and logos to protect your visual content and establish your brand identity.
4. Watermarquee: Add Watermarks and Protect Your Photos with Ease

Watermarquee is an online watermarking tool that empowers photographers, content creators, and businesses to add watermarks to their photos effortlessly. With its intuitive interface and powerful features, Watermarquee makes protecting your visual content a breeze.
Key Features of Watermarquee:
1. Simple and User-friendly: Watermarquee offers a straightforward and easy-to-navigate platform, making it accessible to users of all skill levels.
2. Text and Image Watermarks: You can add text or image watermarks to your photos. Customize the font, size, and transparency to achieve the desired look.
3. Batch Processing: Save time and effort by watermarking multiple photos simultaneously. Watermarquee supports bulk processing, streamlining your workflow.
4. Customizable Placement: Position your watermark anywhere on the image to best suit your composition and branding needs.
5. Image Resizing and Compression: Optimize your photos by resizing and compressing them while adding watermarks.
6. Cloud Storage: Watermarquee offers secure cloud storage for your watermarked images, ensuring easy access and sharing.
How to Use Watermarquee:
Step 1 - Upload Your Photos: Visit the Watermarquee website and upload the images you want to watermark.
Step 2 - Customize Your Watermark: Select the type of watermark you want to apply - text or image. Personalize the watermark's appearance and position according to your preferences.
Step 3 - Preview and Process: Review the watermarked images in the preview window to ensure they meet your expectations. When satisfied, proceed to save the watermarked photos.
Step 4 - Download and Share: After completing the watermarking process, download the watermarked images to your device. They are ready to be shared or published with your brand identity secured.
Watermarquee is an efficient and effective solution for protecting your valuable photos from unauthorized use and establishing your brand identity. Whether you are an individual photographer or a business looking to safeguard your visual content, Watermarquee provides a reliable and hassle-free watermarking experience.
5. Add Watermark to Multiple Photos in Photoshop
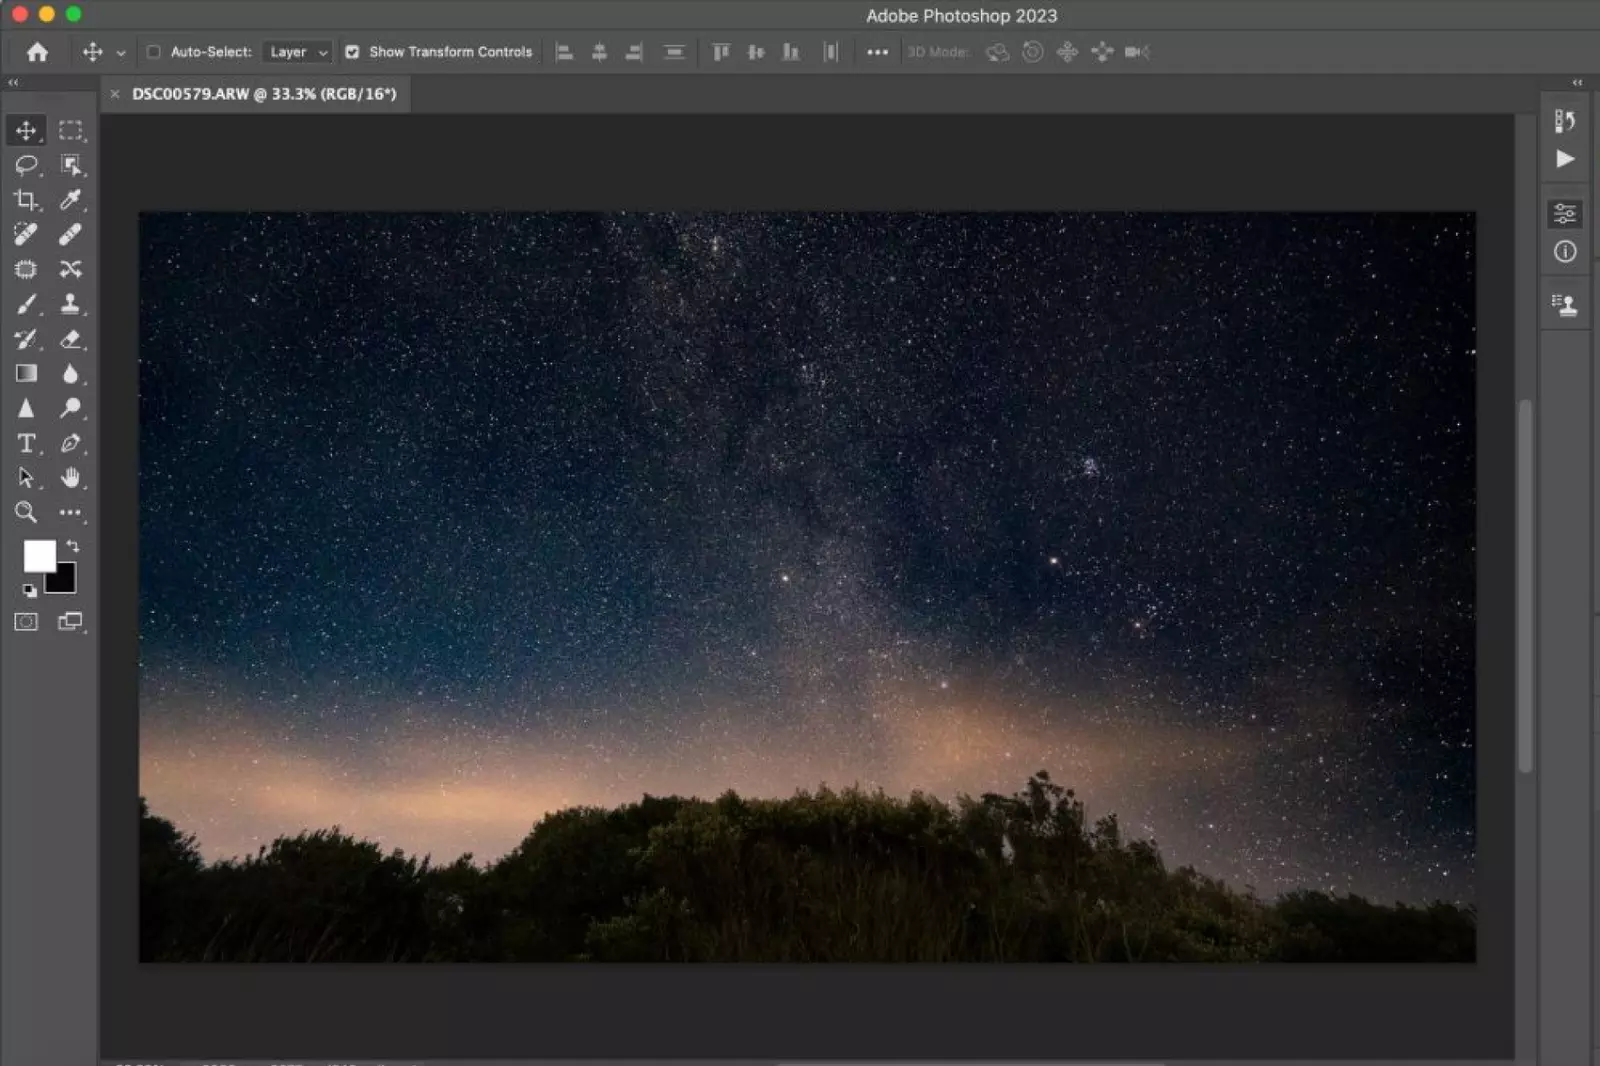
Adding a watermark to multiple photos in Photoshop can be achieved through a batch processing feature. This allows you to apply the same watermark to multiple images in one go, saving you time and effort.
Here's how to add a watermark to multiple photos in Photoshop:
1. Create Your Watermark: Before you start, design your watermark as a transparent image or text overlay. Save it in a separate file for easy access.
2. Prepare Your Photos: Organize all the photos you want to watermark in a single folder. It's essential to keep them in the same format for batch processing.
3. Create an Action: In Photoshop, open one of the images you wish to watermark. Go to the "Actions" panel, create a new action, and name it. This action will record the steps for applying the watermark.
4. Apply the Watermark: With the action recording, go to the "File" menu, choose "Place Embedded," and select your watermark image or type your watermark text.
5. Position and Resize: Adjust the size and position of the watermark to fit your desired location on the photo. Make sure it doesn't obstruct the main subject.
6. Stop Recording: After positioning the watermark, stop recording the action in the "Actions" panel.
7. Run Batch Process: Go to the "File" menu, choose "Automate," and then "Batch." Select the action you just created and the source folder containing your images. Choose a destination folder for the watermarked photos.
8. Customize Batch Settings: In the Batch dialog box, you can choose to override "Open" commands to suppress additional dialog boxes. You can also select "Save As" to specify the format and other settings for the watermarked images.
9. Start the Batch Process: Click "OK" to start the batch process. Photoshop will automatically apply the watermark to all the images in the source folder.
By following these steps, you can efficiently add a watermark to multiple photos in Photoshop, ensuring your images are protected and branded with your identity before sharing or publishing them online.
6. How to Put Watermark on All Photos At The Same Time in Lightroom?
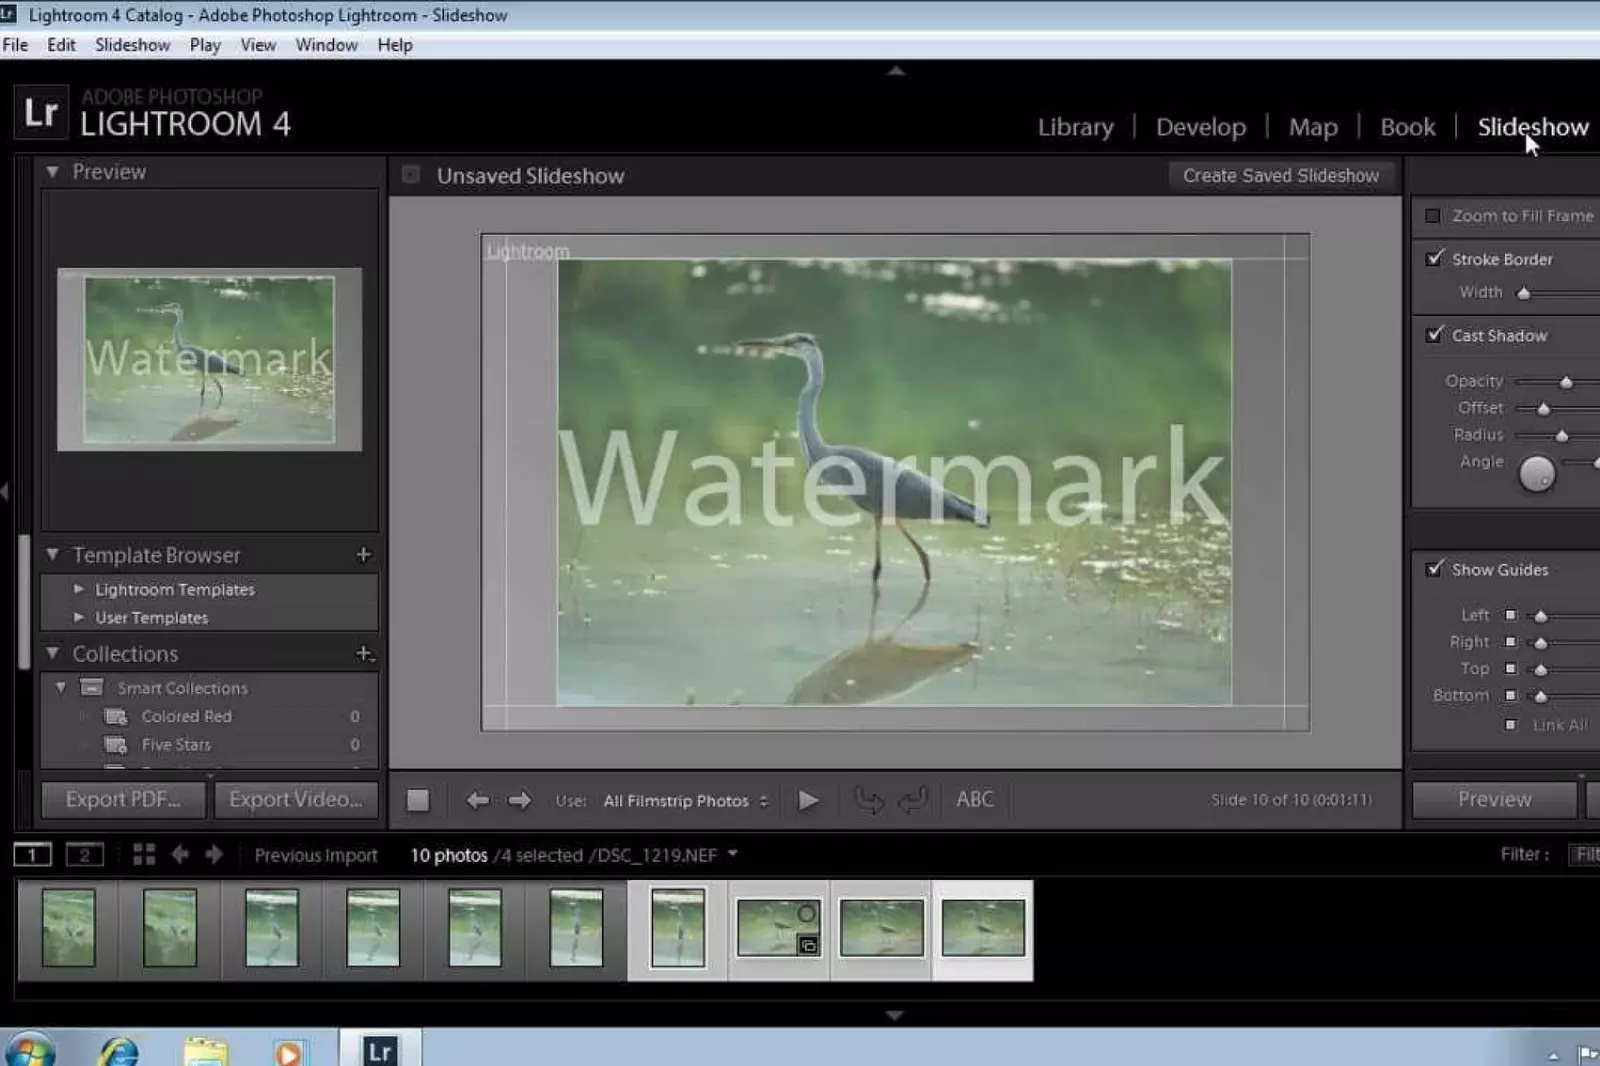
Putting a watermark on all photos simultaneously in Lightroom is a straightforward process that can save you a lot of time and effort. Lightroom's batch processing feature allows you to simultaneously apply the same watermark to multiple photos.
Here's how to put a watermark on all photos at the same time in Lightroom:
1. Create Your Watermark: Before you start, design your watermark as an image or text overlay with a transparent background. Save it in a separate file for easy access.
2. Import Your Photos: Open Lightroom and import all the photos you want to watermark into your library. Organize them into a collection or folder for easy management.
3. Set Up Your Watermark: Go to the "Edit" module in Lightroom and select one of the photos you want to watermark. In the right-hand panel, click on the "Watermarking" section.
4. Choose Watermark Type: In the watermarking section, choose "Graphic" or "Text" to add your watermark. If you choose "Graphic," select the image file of your watermark. If you choose "Text," enter the text you want to use as the watermark.
5. Adjust Watermark Settings: Customize the size, opacity, position, and other settings to fit your preference. Use the preview window to see how the watermark will look on your photos.
6. Sync Watermark to All Photos: Once you have set up your watermark on the selected photo, go to the "Develop Settings" menu and choose "Copy Settings." Check the "Watermarking" option and click "Copy."
7. Apply Watermark to All Photos: Go to the Library module and select all the photos you want to watermark. Right-click on one of the selected photos and choose "Develop Settings," then "Paste Settings." Lightroom will apply the same watermark to all the selected photos.
8. Export Watermarked Photos: After applying the watermark to all photos, you can export them with the watermark. Go to the "File" menu and choose "Export." Select your desired export settings in the export dialogue box and check the "Watermark" option. Lightroom will export all the photos with the watermark applied.
Following these steps, you can easily put a watermark on all photos simultaneously in Lightroom, ensuring your images are protected and branded with your identity before sharing or publishing them.
7. Abraia.me

Abraia.me is an online image-processing platform that offers various image editing and optimization tools for individuals and businesses. It provides a user-friendly interface to process, enhance, and compress images efficiently. One of its notable features is the ability to add watermarks to images simply and intuitively.
Key Features of Abraia.me:
1. Image Watermarking: Abraia.me allows users to add text or image watermarks to their photos easily. This feature is particularly useful for photographers, content creators, and businesses looking to protect their visual content and brand identity.
2. Image Compression: The platform offers powerful image compression algorithms that can significantly reduce the file size of images without compromising quality. Compressed images load faster on websites and save storage space.
3. Image Editing: Abraia.me provides basic image editing tools like cropping, resizing, and rotating, enabling users to quickly adjust their images before applying watermarks.
4. Cloud-Based Platform: As a cloud-based platform, Abraia.me eliminates the need for complex installations or downloads. Users can access the platform from any device with an internet connection, making it highly convenient for on-the-go image processing.
5. Batch Processing: With Abraia.me, users can watermark multiple images in bulk, saving time and effort when dealing with large volumes of photos.
How to Add Watermark with Abraia.me:
Step 1 - Upload Images: Sign in to your Abraia.me account and upload the images you want to watermark.
Step 2 - Choose Watermark Type: Select either text or image watermark from the available options.
Step 3 - Customize Watermark: Customize the appearance and position of the watermark. You can adjust the font, size, opacity, and alignment for text watermarks or upload a custom image for image watermarks.
Step 4 - Apply Watermark: Once you have set the watermark settings, apply the watermark to your images by clicking on the "Apply Watermark" button.
Step 5 - Download Watermarked Images: After processing, download the watermarked images to your local device or save them directly to cloud storage.
With Abraia.me, adding watermarks to your images becomes a seamless process, ensuring your visual content remains protected and professionally branded.
8. Docufreezer.com
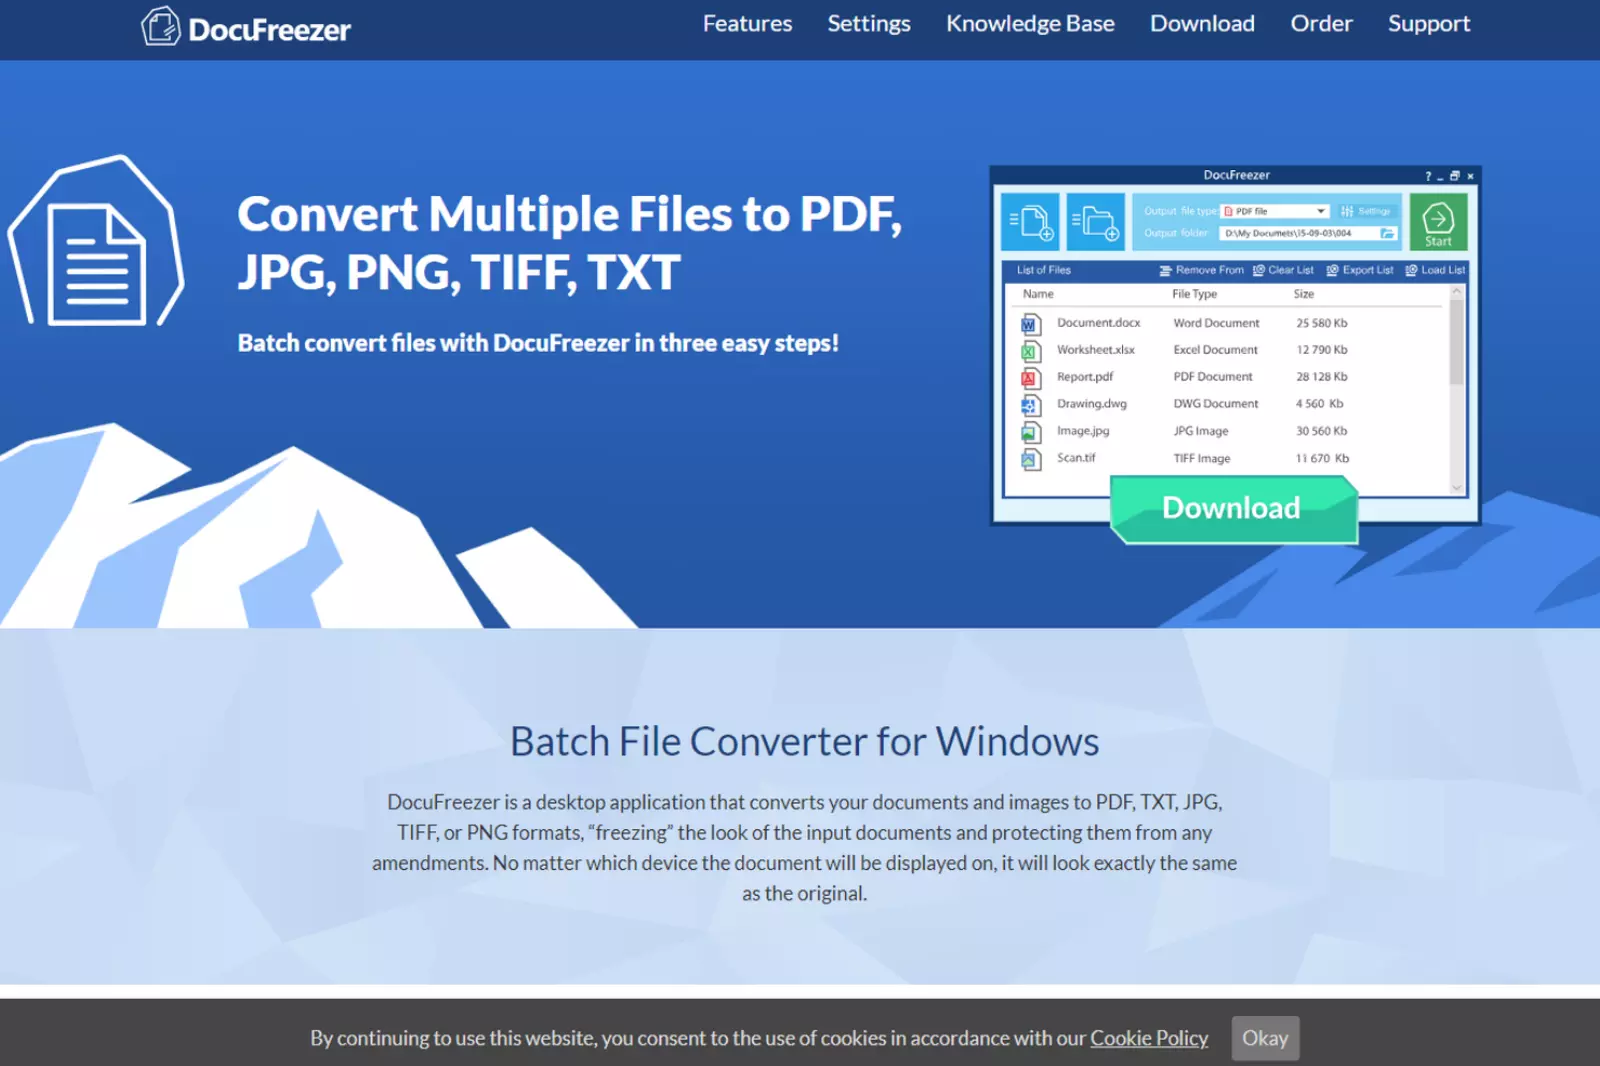
Docufreezer is a versatile document and image conversion software that allows users to convert files to various formats while preserving their original layout and quality. One of its valuable features is the ability to easily add watermarks to documents and images, adding an extra layer of protection and branding to the files.
Key Features of Docufreezer:
1. File Conversion: Docufreezer supports many file formats, including PDF, Microsoft Word, Excel, PowerPoint, AutoCAD, and image formats like JPEG, PNG, TIFF, and more. Users can convert files between different formats without sacrificing quality.
2. Watermarking: With Docufreezer, users can add text or image watermarks to documents and images. This feature is particularly useful for businesses and individuals who want to protect their intellectual property and ensure their documents are properly branded.
3. Batch Processing: The software allows batch processing, enabling users to convert and watermark multiple files simultaneously, saving time and effort.
4. Preserve Original Quality: Docufreezer ensures that the quality and formatting of the original files are maintained during the conversion and watermarking process.
5. User-Friendly Interface: Docufreezer's intuitive interface makes it easy for users of all levels to navigate and utilize its features effectively.
How to Add Watermark with Docufreezer:
1. Select Files: Launch Docufreezer and choose the files you want to watermark by clicking "Add Files" or dragging and dropping the files into the software.
2. Choose Watermark Type: Select either text or image watermark and customize its appearance, position, and transparency.
3. Apply Watermark: Once the watermark settings are adjusted, click on the "Start" button to apply the watermark to the selected files.
4. Convert and Save: After completing the watermarking process, convert the files to the desired format while preserving the original layout and quality.
5. Save Watermarked Files: Save the watermarked and converted files to the desired location on your computer or cloud storage.
Docufreezer offers a reliable and efficient solution for converting and watermarking documents and images, making it a valuable tool for professionals and businesses.
9. 123Watermark to add watermark/logo

123Watermark is a user-friendly online tool allowing users to add watermarks or logos to their photos and images easily. Whether you want to protect your images from unauthorized use, brand your photos, or simply add a personal touch, 123Watermark provides a simple and efficient solution.
Key Features of 123Watermark:
1. Simple Interface: 123Watermark has an intuitive and straightforward interface, making it easy for users of all levels to add watermarks to their images with just a few clicks.
2. Customization Options: Users can customize their watermarks by choosing from various fonts, colors, and opacity levels. Additionally, they can adjust the position and size of the watermark to suit their images best.
3. Batch Processing: 123Watermark supports batch processing, allowing users to add watermarks to multiple images simultaneously, saving time and effort.
4. Preview and Compare: Before finalizing the watermarked images, users can preview the changes and compare the original and watermarked versions side by side.
5. Image Protection: By adding a watermark, users can protect their images from being used without proper attribution, discouraging unauthorized use and promoting their brand.
How to Add Watermark or Logo with 123Watermark:
Step 1 - Upload Images: Visit the 123Watermark website and upload the images you want to watermark by clicking the "Choose Images" button.
Step 2 - Customize Watermark: Choose whether you want to add a text or image logo watermark. Customize the watermark's appearance, size, and position according to your preference.
Step 3 - Apply Watermark: Once the watermark settings are adjusted, click on the "Apply Watermark" button to add the watermark to your images.
Step 4 - Preview and Compare: After applying the watermark, preview the watermarked images to ensure they look exactly as desired.
Step 5 - Download Watermarked Images: Once satisfied with the results, download the watermarked images to your computer or share them directly on social media.
123Watermark provides a convenient and efficient solution for adding watermarks or logos to images. It is a valuable tool for photographers, content creators, and businesses seeking to protect their intellectual property and establish their brand identity.
10. BeFunky's Watermark tool

BeFunky's Watermark tool is a versatile and user-friendly solution for adding watermarks to images effortlessly. Whether you're a photographer, blogger, or social media enthusiast, this tool enables you to protect your digital content and promote your brand with ease.
Key Features of BeFunky's Watermark Tool:
1. Customizable Watermarks: BeFunky allows you to create fully customizable watermarks using text, logos, or graphics. You can choose from various fonts, colors, and sizes to make your watermark unique.
2. Batch Processing: Save time by applying watermarks to multiple images simultaneously. BeFunky's batch-processing feature streamlines the process and ensures consistency across your entire image collection.
3. Placement and Opacity Control: Precisely position your watermark on the image and adjust its transparency to achieve the desired effect without compromising visibility.
4. Watermark Templates: Choose from a selection of pre-designed watermark templates or create your own for a professional and polished look.
5. Instant Preview: See how your watermark looks on the image in real-time, allowing you to make any necessary adjustments before finalizing.
How to Add Watermark using BeFunky:
Step 1 - Visit the BeFunky website and click on the "Watermark" tool from the main menu.
Step 2 - Upload Your Image: Upload the image you want to watermark by clicking the "Upload" button.
Step 3 - Customize Your Watermark: Choose between adding text or an image as your watermark. Adjust the font, color, size, and placement to your liking.
Step 4 - Batch Process (Optional): If you have multiple images to watermark, use the batch processing feature by clicking "Add Images" and selecting multiple files.
Step 5 - Apply Watermark: Once your watermark is customized, click the "Apply" button to add it to your image or images.
Step 6 - Save and Share: After applying the watermark, save your watermarked image to your computer or share it directly on social media.
BeFunky's Watermark tool offers a seamless way to protect your images, establish your brand identity, and maintain a professional image across all your digital content. Whether you're a seasoned photographer or a social media influencer, this tool is valuable for safeguarding your creative work.
11. Watermarkly

Watermarkly is a powerful online tool designed to help users easily add watermarks to their images. Whether you are a photographer, blogger, or business owner, Watermarkly offers a quick and efficient way to protect your photos and promote your brand.
Key Features of Watermarkly:
1. Simple and User-Friendly Interface: Watermarkly provides a user-friendly interface that requires no technical expertise. Adding watermarks to your images is a straightforward process.
2. Text and Logo Watermarks: You can choose between adding text or logo watermarks to your images. Customize the text with different fonts, colors, and sizes, or upload your logo to give your images a professional touch.
3. Batch Watermarking: Watermarkly allows you to add watermarks to multiple images at once, saving you time and effort.
4. Positioning and Opacity Control: Precisely position your watermark on the image and adjust its transparency to achieve the desired effect.
5. Instant Preview: See how your watermark looks on the image in real-time, allowing you to make any adjustments before finalizing.
6. Customizable Templates: Watermarkly offers a selection of pre-designed watermark templates to choose from, making it easy to create a consistent watermark for your brand.
How to Use Watermarkly:
Step 1 - Visit the Watermarkly website and click on the "Add Watermark" button.
Step 2 - Upload Your Image: Upload the image you want to watermark by clicking the "Select Photo" button.
Step 3 - Choose Watermark Type: Select either text or logo watermark and customize it to your preference.
Step 4 - Adjust Position and Opacity: Position the watermark on your image and adjust its opacity as needed.
Step 5 - Batch Process (Optional): If you have multiple images to watermark, use the batch processing feature by clicking "Add More Photos."
Step 6 - Apply Watermark: Once your watermark is ready, click the "Apply Watermark" button to add it to your image or images.
Step 7 - Download or Save: After adding the watermark, you can download the watermarked image to your computer or save it directly to your preferred storage.
Watermarkly is a convenient and efficient tool for protecting your images and establishing your brand identity. With its intuitive features and batch-processing capabilities, watermarking multiple images has always been challenging.
How to Remove Watermark if Added in Photo
Removing watermarks from photos can be a tricky task, especially if they are added in a way that covers a significant portion of the image. However, with the right tools, like Watermarkremover.io, this process can become much easier and more efficient.
Watermarkremover.io is an online tool specifically designed to remove watermarks from images. It utilizes advanced algorithms and artificial intelligence to intelligently detect and remove watermarks while preserving the overall quality of the image. The tool is user-friendly and accessible from any web browser, making it convenient for users to remove watermarks from their photos without complex software installations.
Features of Watermarkremover.io:
1. Easy-to-use interface: The tool's intuitive interface allows users to upload photos and quickly remove watermarks with just a few clicks.
2. Fast and efficient processing: Watermarkremover.io employs powerful algorithms, ensuring speedy processing and optimal results.
3. Batch processing: Users can simultaneously remove watermarks from multiple images, saving time and effort.
4. High-quality output: The tool ensures that the final images retain their original quality even after watermark removal.
How to use Watermarkremover.io:
Step 1 - Open your web browser and go to the Watermarkremover.io website.

Steo 2 - Click the "Upload Image" button and select the photo from which you want to remove the watermark.
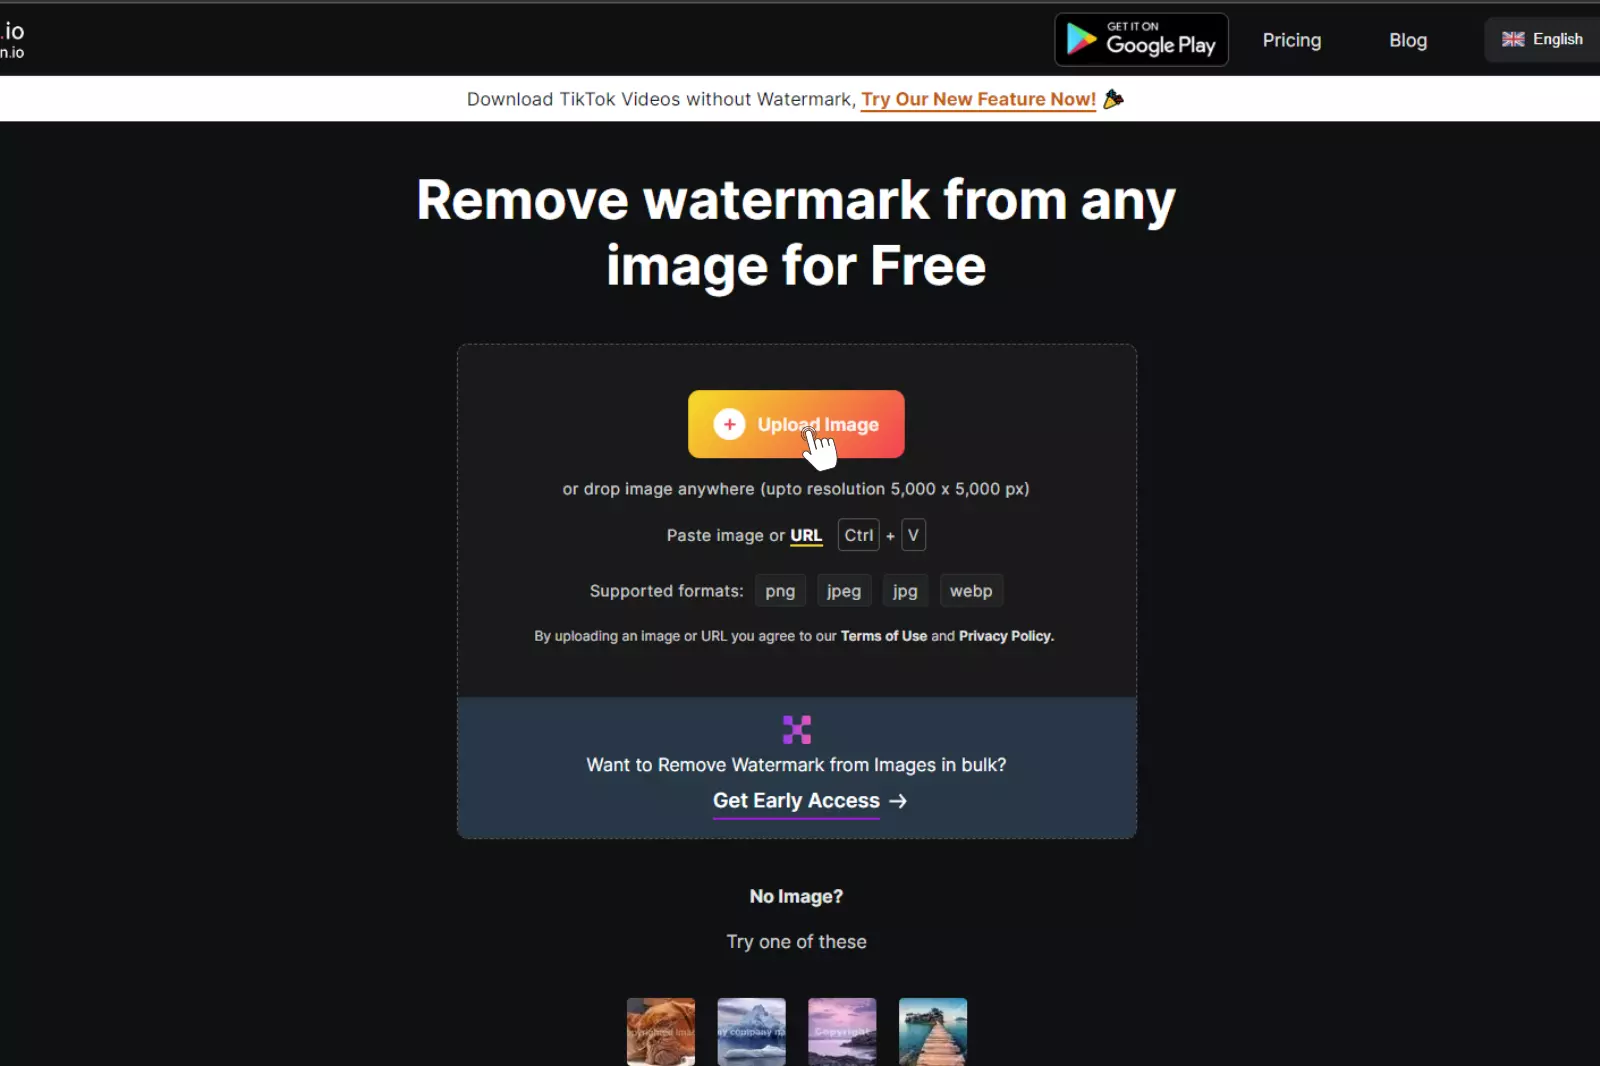
Step 3 - Wait for the tool to process the image and remove the watermark.

Step 4 - Download the cleaned image to your device.

Please note that while Watermarkremover.io is effective at removing certain types of watermarks, it may not be able to remove highly complex watermarks or those that cover a large portion of the image. In such cases, manual editing may be required. Additionally, always ensure you have the right to remove the watermark from the image before using any tool.
Conclusion
Adding watermarks to your photos is crucial in protecting your intellectual property and promoting your brand. Watermarks serve as a visual signature, ensuring that your images are attributed to you and discouraging unauthorized use or theft.
With the availability of various watermarking tools and online services, the process has become more accessible and efficient. Whether you're a professional photographer, blogger, or business owner, watermarking provides a simple and effective way to safeguard your creative work and maintain your professional identity in the digital world.

