
How to Quickly Remove Watermark from Alive Movie Maker


Due to the abundance of short-video streaming services, people all around India are working incredibly hard to deliver you the best possible content. TikTok has developed the prominence of the short-video genre.
However, owing to the ban in India, other companies in the entertainment industry are filling the need for short films. Instagram Reels, ShareChat, MX TakaTak, Chingari, Josh, YouTube Shorts, Moj, and numerous other well-known sites are among the others we have included.
Nearly all of these websites have sizable user bases, and the vast majority of these users are also active on other platforms. Cross-platform video uploading is a frequent issue that results from this circumstance. This is because each application watermarks each video you post to a certain platform.
Then, how are you going to reshare it on other platforms? Read on to find out how to quickly remove the watermark from any video and share it on other platforms since we'll show you various online watermark removal methods in this post.
Given that they can efficiently secure the copyright of creators' works, watermarks are an essential element of both video and image development. What should any YouTube creator do if, after uploading a video, they notice the editing software's emblem on the video? You can find specific explanations on how to remove the watermark from a video in this article.
You could watermark a video; however, a few days later, you might decide to remove the watermark and notice the original video has disappeared. The one and only alternative in this scenario are to swap the new watermark for the older one on the video.
You may edit videos and produce slideshows with the highly well-liked application Alive Movie Maker. Still, you need to include the Alive Movie Maker watermark in your modified videos and slideshows.
You would need to shell out a significant sum to acquire watermark-free videos. Therefore, most people search for alternative Alive Movie Maker apps with no watermark approaches.
Creating a video requires a significant amount of time. You notice a huge watermark on your video after uploading it. You opt to delete the watermark from the video rather than just make it from scratch to save time.
Why is a Watermark Added to Videos Modified by Free Users by Alive Movie Maker?
Users of Alive Movie Makermay make and edit videos without having to purchase a membership, thanks to its free software for video editing. The fact that all videos edited using Alive Movie Maker by free users have a watermark added to them is one downside of employing the free version of the application.
Especially if you're attempting to make a video that looks professional, this could be rather unpleasant. What makes Alive Movie Maker act in this manner, then? Actually, the watermark is a tactic utilized by the firm to encourage consumers away from utilizing the software's free version.
Videos edited using the free version now include a watermark, which diverts attention from their clean and professional appearance. Due to this, users of Alive Movie Maker are more inclined to upgrade to the premium version in order to erase the watermark from their recordings.
There are, of course, methods for getting rid of the watermark of your videos if you're prepared to put in a little work. You can learn how to execute this from a variety of internet tutorials, and the majority of the time, it's not particularly challenging. Nevertheless, it's essential to bear in mind that erasing the watermark from your video would likely cancel your guarantee with Alive Movie Maker.
Can Alive Movie Maker Videos Have Watermarks Removed?
There are a variety of techniques you may consider if you would like to erase the watermark off of your Alive Movie Maker Video recordings. You must first upgrade to Alive Movie Maker's Pro edition to export your movies without a watermark.
A video editing tool like Adobe Premiere Pro or Final Cut Pro can also be employed to get rid of the watermark. Last but not least, if you're feeling very daring, you may attempt altering the Alive Movie Maker source code to get rid of the watermark yourself. In advance, back up your videos using whichever technique you decide to use in case anything goes wrong.
How to Remove the Watermark in Alive Movie Maker from Your Android Phone?

You might have noticed that all of your video clips have a watermark if you have an android smartphone and are using the Alive Movie Maker app. Especially if you want to make a video that looks professional, this could become irritating. Fortunately, it is very much possible to erase the watermark from your videos. Just carry out these easy steps.
Step 1 - Launch the Alive Movie Maker app and select "My Videos."
Step 2 - Choose the video from which you wish to remove the watermark.
Step 3 - Tap "Export Video" after selecting the "Share" button.
Step 4 - Select "Remove Watermark" and then click "Export."
Step 5 - The watermark will now be removed from your movie once it is exported!
How to Remove the Watermark in Alive Movie Maker from Your iPhone

On your iPhone, removing the watermark from Alive Movie Maker is simple. These are the actions:
Step 1 - First, select the "Edit" option from the menu that appears in the top right corner of the screen.
Step 2 - Choose the movie you wish to alter, then click the "Watermark" icon in the bottom left-hand corner.
Step 3 - In the third step, click the "Remove" button located in the top right corner of the screen.
Step 4 - Click "Save" in the right upper corner of the screen to save your changes.
Other Ways to Remove Watermarks from Videos
How can I erase the watermark from a video? You will discover four efficient and effective ways in this article for erasing video watermarks.
1. Blurring the watermark.
2. Cropping the video.
3. Using a watermark removal programme.
4. Replacement of the watermark.
Blurring the watermark.
You may modify your posted YouTube videos on the internet by utilising the YouTube video editor. You may apply it to cut the video in halves and blur a face or even another item in the frame. You would like to remove the watermark from the video after you post it to YouTube and notice it doesn't match the watermark.
You have the choice between two possibilities. Re-upload the edited video on YouTube after removing the original and modifying it with software. You might also utilize a video editor on YouTube to blur the watermark. If you can't find the actual video file on your personal computer, the latter method is more effective.
This section will explain how to blur a video's watermark in order to completely remove it. The procedures listed below should always be undertaken.
Step 1 - Open the official YouTube website and sign into your YouTube page to access the platform's primary interface.
Step 2 - On the main page, select your account avatar in the upper right-hand corner of the window. Just choose the YouTube Studio (beta) box from the drop-down menu.
Step 3 - Tap Videos to edit your YouTube videos on YouTube Studio's (beta) interface.
Step 4 - All videos on YouTube will be displayed here; just pick the one from which you would like to erase the watermark and click it.
Step 5 - Select the Editor choice to launch the YouTube video editor.
Step 6 - You can blur an element or a person you would like to conceal on this webpage, add music that is not really protected by the copyright to the video, and cut the beginning and ending of the movie here. You may click the ADD BLUR icon to conceal the watermark and remove it from the video.
Step 7 - Pick Custom blurring, then hit Edit to access the blurring tool.
Step 8 - Click the video watermark whenever it displays on this webpage. You may resize the obscured region to make the watermark bigger if it is too big presently. When blurring ends, you must make adjustments since the watermark is indeed visible in the video. Decide when the blurring gets going by dragging and pressing the timeline's endpoints.
Step 9 - Hit the Done button after applying the blur effect to the watermark.
Step 10 - To implement changes, hit on Save. Please patiently wait till the procedure has been completed because it's going to take some time. Your YouTube video will thereafter stream without a watermark.
Cropping the Video.
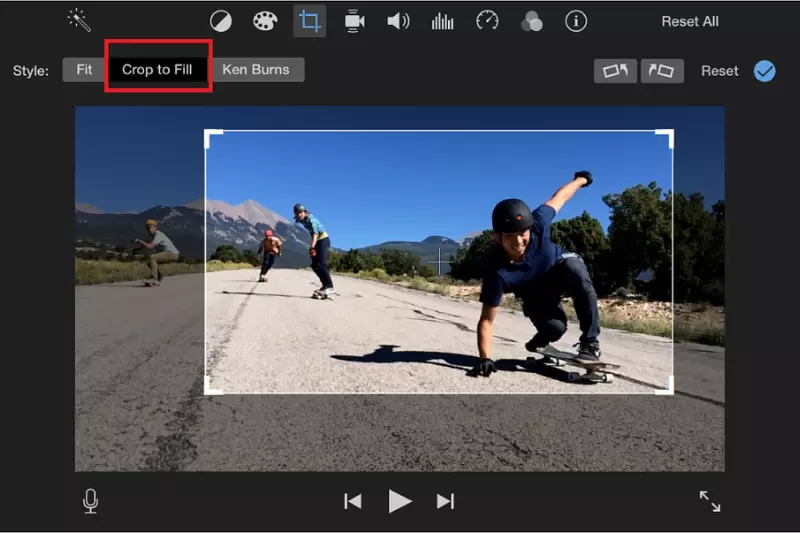
Try cropping the video if you weren't happy with the methods mentioned above. You may completely get rid of the watermark in the video by following this procedure. The steps for cropping the video are described in this section.
Step 1 - First, download any video convertor or editor app, install it, and start it to enter the platform's main interface.
Step 2 - Click Add File on the MP4 menu to access the video you would like to crop.
Step 3 - After that, tap on Clip, and then the video will start to run automatically. To pause the video, click the Play button.
Step 4 - On this tab, click the icon that resembles an inverted triangle. Choose the Crop option from the drop-down menu.
Step 5 - Next, drag and resize the red frame to keep the required video content. Simply select OK.
Step 6 - To implement adjustments, click OK in the pop-up window that has been displayed. Then, touch Start inside the toolbar.
You can see the video without a watermark after the process has been completed.
Using a Watermark Removal Programme.
Try a proficient watermark remover if you would like to fast and simply remove the watermark from the video. You may batch-process several watermarks at once with it. The steps are summarized below.
Step 1 - Download the application, install it, and launch it.
Step 2 - If you don't want to upgrade to the pro version, close the pop-up window. Select the tab labelled Remove watermark from video.
Step 3 - Click on drag and drop to add video(s) on this page to open the video you want to remove from.
Step 4 - Select the Selection Tool to eliminate the unwanted components. After that, choose the watermark with the selection tool. You can adjust the chosen region to hide it.
Step 5 - To select a location to save the film, click the folder icon. When you click Convert, a pop-up window appears, which you can dismiss. The video will then be converted automatically.
Replacement of the Watermark.
Take the text watermark off.
If you notice a little text watermark in the video, you may choose to use any video editor tool, to substitute it with a custom text watermark.
Step 1 - Launch the application after downloading and installing it to access the program's primary interface.
Step 2 - Choose the video you wish to add and press the Open button after choosing Add movies and photographs in the toolbar. The target video can likewise be dropped right into the project.
Step 3 - The text watermark may be noticed in the lower right-hand corner of the video file after it has been imported. In order to set up a text watermark, next click on Caption inside the toolbar.
Step 4 - Insert the text you would want in the required box, then select your desired font. Adjusting the font size and colour will entirely conceal the original text watermark.
Step 5 - You should indeed set the moment whenever the text watermark starts and ends if you would like it to appear all through the full video. It is not necessary to adjust the Start time because it has already been set to "0.00s." In the Text time box, type the duration of the video.
Step 6 - Select a saving route in the toolbar by clicking the Home menu and then tapping Save movie.
Take the image watermark off.
If a video watermark is just a graphic watermark, any third-party video editor which also removes the watermark can be utilized. Through using the tool, you can alter your flash video to mp4. Furthermore, you can watermark videos with texts and images by employing this video converter.
With it, you may add your own digital image watermark in the place of the original image watermark. the steps listed here.
Step 1 - First, download and install the editor application, then open it to get the software's main interface.
Step 2 - Choose the standard file type, MP4, from this webpage. The video you would want to watermark-free will be then displayed once you click Add File and choose it.
Step 3 - Click Output Settings to add a watermark to the video. The Watermark option is placed in the interface's lower right-hand corner for the Video Settings. To enter its interface, click Watermark.
Step 4 - Here on the Watermark tab, there are three choices: Add Picture, Add Text, and Clear. You must select the Add Picture option in order to delete the image watermark.
Step 5 - Click Add Picture to access the image watermark that you have prepared in advance. You may adjust the watermark and then drag it to the appropriate position to hide the original watermark. After hitting OK, type a name you would like in the pop-up box.
Step 6 - Ultimately, click OK to open the platform's main interface. In the toolbar, click on start. The operation will be finished in a short period of time.
How to Get Rid of the Watermark from an Apple iPhone Video
People who use Apple iPhones can also erase the watermark from any video they want using a wide range of App Store applications. You can instantly eradicate video watermarks with the free watermark removal software termed Video Eraser - Remove Logo.
The application is very much suitable for a variety of video file types, which incorporate mp4, 3gp, m4v, and more. You can use this app as follows:
1. Find Video Eraser - Remove Logo by browsing for it within the Apple App Store. Install the app on your iPad or iPhone by downloading it.
2. By tapping on the Plus button in the top right corner of the screen, you may open the application and import the video.
3. The Remove Watermark feature may be located on the video icon.
4. Select the video's watermark region and then tap Start.
5. The software will begin processing in order to delete the video's watermark. When it's completed, you can get a preview of the video by picking the Processed tab.
Removing Watermarks From PNG, JPG, JPEG, WEBP Images
You want to establish yourself as the photographer when you show them some of your incredible photos. To secure your photo's copyright, you will impose a watermark.
When you simply want to employ one of the photographs as your desktop wallpaper, though and don't concern yourself with keeping the original, removing the watermark from the photograph is the best alternative.
This section will show you how to effectively erase a photo watermark from png, jpg, jpeg, or webp image formats.
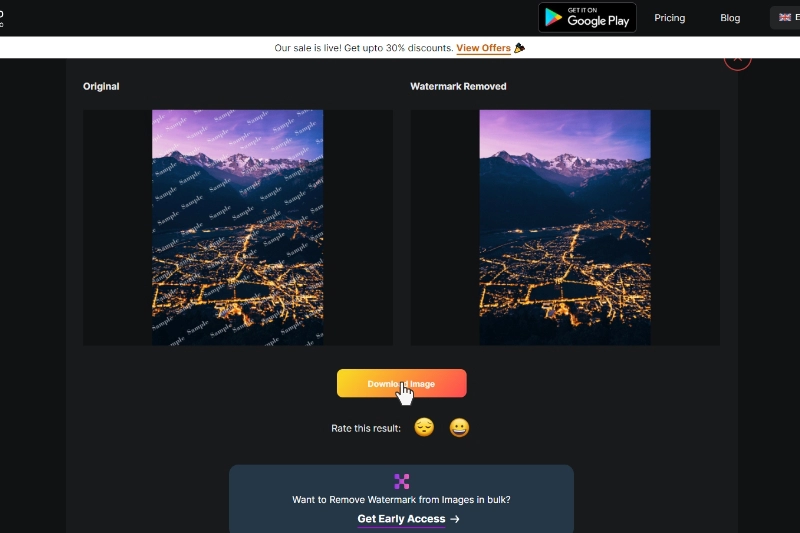
Step 1 - Go to the watermarkremover.io online web site and choose Upload image from the pop-up menu.
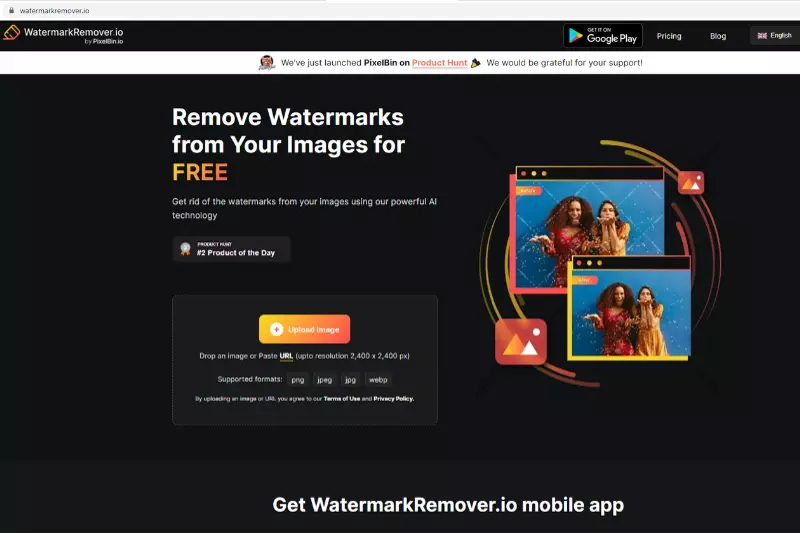
Step 2 - Choose amongst png, jpg, jpeg, or webp images from which you wish to remove the watermark, then click Open to load it.

Step 3 - The watermarkremoval.io tool will automatically detect the placement of watermarks on your image and start removing it automatically.
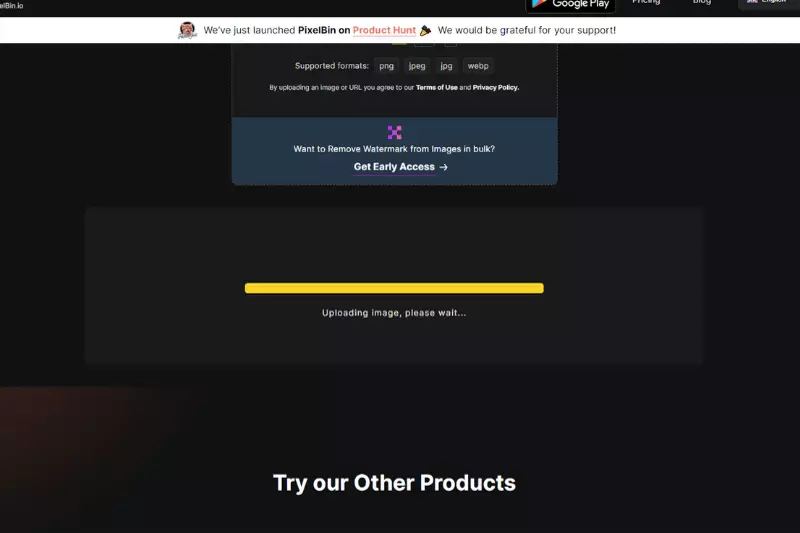
Step 4 - Finally, you’ll get the output in the form of transformed image.

Step 5 - Download the final image and use it further as per requirements
Wrapping Up
People might become quite irritated and turn away from watching your videos if they have a watermark. You can get rid of them, thankfully, in a few different methods. Although Alive Movie Maker is an excellent Android video editing app, all videos that you export from it have a watermark on them.
In this post, we demonstrated how to remove the Alive Movie Maker watermark using a few different techniques like as utilising a third-party tool or, editing the movie directly in Alive Movie Maker or cropping the video. We hope one of these solutions works for you so you can finally enjoy using Alive Movie Maker without the watermark.

